Disclaimer: Due to privacy agreements I cannot share the exact name of the client that I’m going to be discussing within the post.
Ever since the first Penguin update on April 24th 2012, the way we approach link building has completely changed. A lot of hard lessons were learnt and many businesses, not to mention all of those SEO agencies, suffered huge losses. But one man’s loss is another man’s gain. Amongst all of the chaos there was money to be made – this came in the form of search engine recovery projects.
I recently spoke to Christoph Cemper – the man behind the Link Detox Tool and Mark Traphagen of Virante (who created the Remove’em tool) – and asked them “What kind of opportunities have you found since the major Panda and Penguin updates over the past 2 years?” Here’s what they had to say…
Christoph Cemper:
“One word – Quality.
Since I started talking about my rules and guidelines that we use in SEO and link building I talked about quality, especially when it came to link building, at a price.
A lot of people always took the shortcuts – mostly for budget reasons and didn’t understand the risk they built into their link profiles especially.
Since the launch of Panda updates and especially the Penguin updates all those agencies that stuck to quality were really on the winning side. To my knowledge those were the minority.
Today everyone who understands what quality links really mean and manages to stay away from those tempting cheap offers of “guaranteed submissions”, “guaranteed manual link building” and other scammy offers you still find everywhere on the web will succeed.
My saying “you get what you pay for” has never been more true, and many people that paid peanuts for crappy links got their penalty or filter now as Google started enforcing rules that were WAY older than 2 years in my book.”
Mark Traphagen:
“Not long after Penguin 1.0 rolled out we started getting an increasing number of inquiries from webmasters seeking help in restoring the ranking power of their sites that had been hit by the algorithm update. While many of these sites had a major cleanup job ahead of them, we realized that there were a significant number who could probably do the restoration work themselves if they had just a little bit of help. So we adapted our in-house tools into Remove’em, a self-serve tool that automates or streamlines many aspects of the link removal and reinstatement request process.
But an ever-increasing number of site owners told us the size of their problem was too huge for them to deal with. At their urging we created a full-service product, where our team of highly-experienced link removal experts take over the process. This has proven to be the fastest growing part of our entire search marketing agency business. But we hadn’t seen anything yet! When Penguin 2.0 hit in late May, our number of monthly new Remove’em accounts more than tripled, and there has been no let up to date. Another growing part of our business: webmasters using our tool or full service to clean up their link profiles prophylactically in attempts to stave off any future algorithm updates.”
Myself and the rest of the team at Wow Internet have been working with webmasters that have suffered at the hands of Google’s updates for nearly two years now, and have learnt our fair share of lessons along the way as well. We’re quite proud of one project in particular that we took on after the client was banned from Google in February 2012. I thought it would only be fair to share our approach, the tools we used and what we found worked best, so that those with long-standing search engine penalties could have a little hope!
Background of the Project
I was first approached by the client in February this year. They run a huge non-profit international Christian community website and had received a manual search engine penalty on 23rd February 2012. I was told that they hadn’t worked with an SEO agency before but they had instead tried to do it all themselves.
The result was that tens of thousands of links had been paid for from their internal teams from around the world. No record had been kept of the links that were purchased and nearly all of them were exact-match anchor text – not good. To top it off, they had sent through repetitive reconsideration requests that were, of course, thrown back at them.
Stage 1: Assessing the Situation
The first stage of any search engine recovery campaign involves deep analysis to identify any specific issues that contributed to the manual penalty. To do this, I use as many different link analysis tools as possible so that I can get the most accurate picture of the link profile. For this stage of the project I used the following:
- Majestic SEO
- Ahrefs
- Open Site Explorer
- Google Webmaster Tools
- Yandex Webmaster Tools

You’re probably looking at those tools and thinking ‘Why Yandex Webmaster Tools?’. The reason is that Yandex WMT is awesome for identifying the links coming back to your website. I use this on each of my link building campaigns, because it gives a far greater representation of links coming back to the website than Google’s WMT suite.
1.1 Gathering the Links
This stage of analysis has to be one of the most critical parts of your project – if you cut corners here then it will come back to haunt you. I spent a whole day on simply gathering the links to the website; as you will see when you read on, this isn’t the only time you will need to do this. I suggest using Majestic SEO, Ahrefs, Open Site Explorer, and Google Webmaster Tools:
1.2 Organising Your Links
Once I had each of the .csv files with the complete list of links going back to the client’s website, it was time to organise things a little. The first thing that I always do within search engine recovery projects is place all of the links into one master spreadsheet so that I have everything in one place.
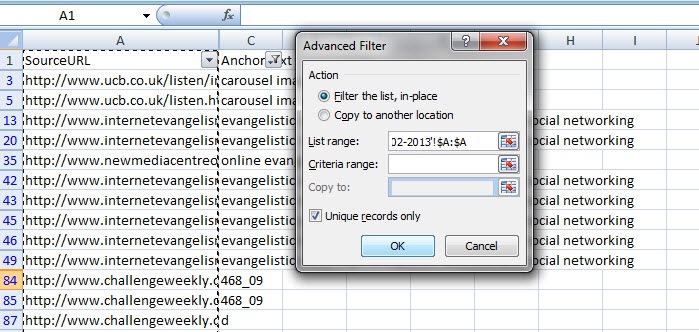
The next step is to get rid of any of the duplicated links in the master spreadsheet. You can do this in Excel easily by selecting the column which has your list of URLs then going to Data>Filter>Advanced Filter and ticking the box that says ‘Unique records only’.
Once I had all of the duplicate links removed from my spreadsheet, it was time to identify some trends within the data. Initially I always look for site-wide links. A quick and visual way of doing this is as follows:
On the sheet containing the list of all the backlinks, press CTRL+F then find where ‘http://’ appears and replace it with ‘ ’ (i.e. nothing). Now do the same with the term ‘www.’. This will remove the ‘http://www.’ from all of the URLs and leave you with the root domain.
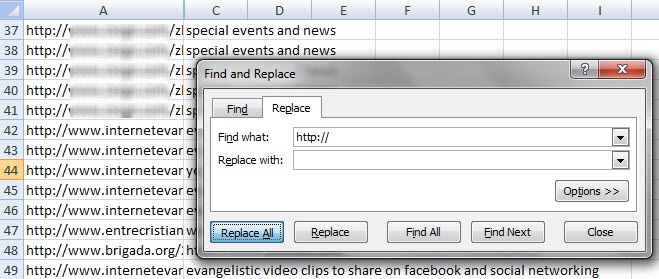
Now you’ll want to remove anything after the root domain, for example, domain.com/we-don’t-want-this-text/. I won’t go into the gory details of how to do this – check out this handy post.
Next we need to find out how many times a domain has linked to the site. To do this, type in the following formula in the column next to your list of domains (assuming they are in column A):
=COUNTIF(A:A, A2)
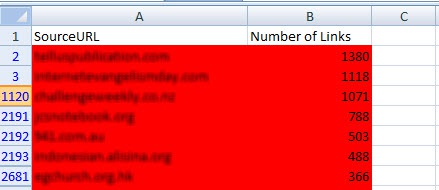
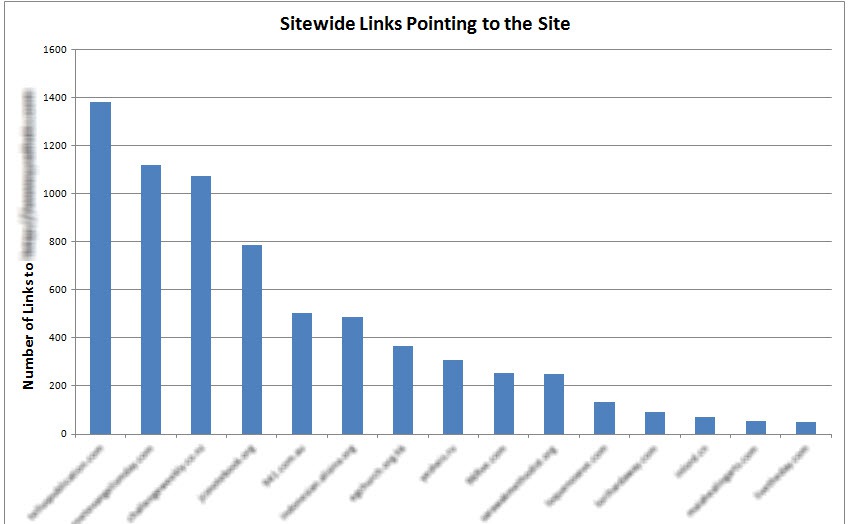
You can now use the advanced filter to remove any duplicates from the domain list column. If you sort the ‘Number of Links’ column in descending order you will have all of the big site-wide link culprits in the forefront of your vision. I now like to put this into a bar-chart to make it even clearer to the client.
Stage 2: Digging Deeper into the Links
The second stage is to dig a little deeper into all of the results that you have gathered, in order to find some trends that will pin-point specific reasons for the manual penalty. Within the project that I was working on, it was clear that there were a lot of site-wide links (all with exact-match money keywords) pointing back to my client’s site. I guessed that this was probably only the tip of the iceberg and I wasn’t wrong.
2.1 Using the Link Detox Tool
Along with Virante’s Remove’em tool, the Link Detox tool from LinkResearchTools has to be my favourite tool to use within these types of projects. For this specific project, I used the Link Detox tool to find certain trends within my data and give me a direction to follow for the next stages of the project.
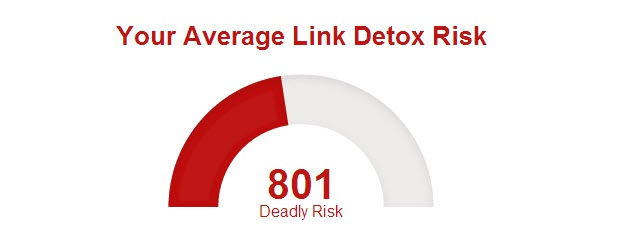
One reason why I love the Link Detox tool is because you can upload all of your own links as well as using their link index. This is exactly what I did. I used the master spreadsheet of all the links that I put together and uploaded this to Link Detox – once it had worked its magic I could quickly see a breakdown of the links that were ‘toxic’ and ‘suspicious’. I then exported this list of links to a separate Excel spreadsheet.
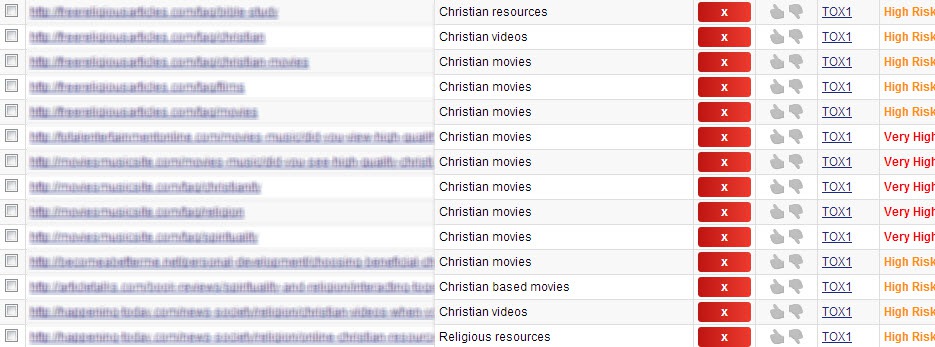
A word of warning with the Link Detox tool – remember that it is never going to be completely 100% accurate and will therefore require some human element. Use the results as a guide (which will save you endless time) and then go through the links yourself to double-check.
2.2 Summarizing the Results
What I found from my analysis was that the poor link building work that had been carried out by the internal team within my client’s business was on a much larger scale than was first anticipated. Here were the major issues identified:
- Extensive over-optimization of anchor text from backlinks.
- Large number of site-wide backlinks from irrelevant websites.
- Many of the links were from sites that also had Google penalties.
- Large quantities of dofollow banner links had been placed on low quality sites.
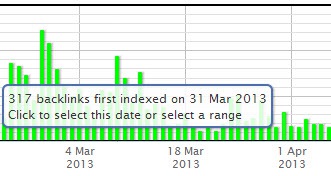
- Hundreds of new spammy links were being indexed every day (from over 2 years ago in some cases).
Stage 3: Taking Action
Once I had my ‘hit list’ of toxic links, it was now time to start compiling the contact information for these sites in order to begin the link removal requests.
Many of you know I’m a fan of utilizing oDesk to automate specific processes within my projects. The procurement of contact information is a prime example of where oDesk is fantastic. As there were such a huge number of links I needed to gather further information on, it made sense to split this task between a few different freelancers to get it done quickly and effectively.
BuzzStream
Another method that I used to get the contact information of webmasters was by using BuzzStream. If you don’t have a subscription to this tool and you’re involved in online marketing – take a free trial because it’s pretty awesome. Even if you’re not using it for Google penalty removal, it has fantastic link prospecting features.
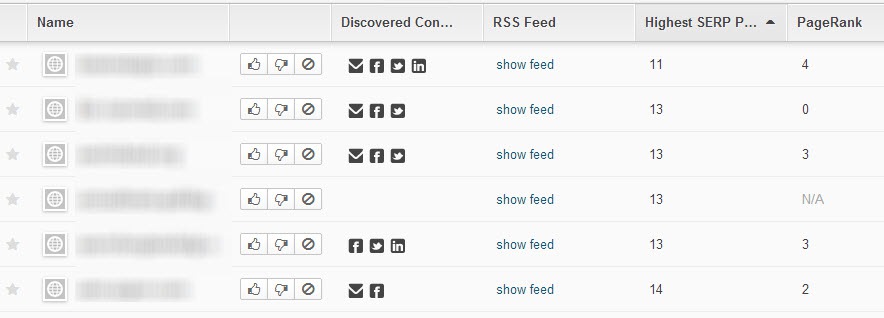
One particularly useful feature of BuzzStream is the ability to import a list of URLs and it will automatically scour the website to find contact information. That was essential within this search engine recovery project. To do this, simply click on the ‘Add Websites’ button within the ‘Websites’ tab of Buzzstream. Once you have clicked the button you then need to select ‘Import from existing file’ and you can upload your master .csv file of all the links or you can just upload the raw Ahrefs/OSE/WMT/Majestic SEO lists – awesome!
Bearing in mind that a lot of the webmasters that I had to get in touch with were from spammy, low quality websites, it wasn’t realistic to think that BuzzStream could find all the details needed; however, it did find at least 40% – which was a fantastic result. This saved me a huge amount of time and meant that I had to spend less on outsourcing the work.
3.1 Contacting the Webmasters
Once I had a list of all of the webmasters that needed to be contacted, I created an email template. I’ve found here that it’s quite important to make the webmasters feel that there could be negative effects on their website if they don’t remove the link. Also, I always make sure that I give them the exact URLs where the links appear so that they have to do as little searching as possible. Here’s the template email that I use:
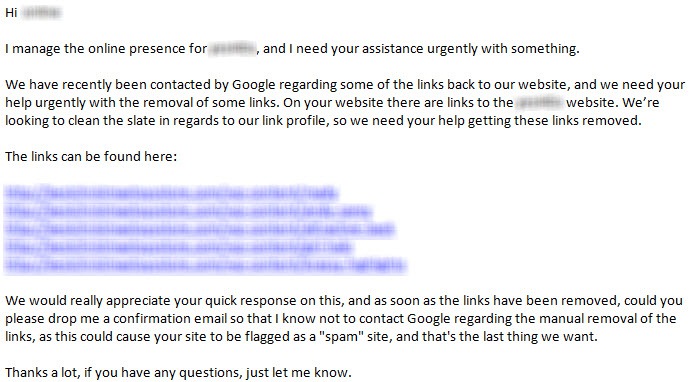
This is where BuzzStream saved the day again. I asked the client to set me up with an email address from their domain (this dramatically improved response rates) and input the IMAP details into BuzzStream. By doing this, my team and I could send emails directly through BuzzStream via the client’s email address. I then imported my outreach template, along with a couple of variations (so that I could split test) and then started sending them to my list of webmasters.
For each webmaster, there were three attempts made to contact them over the space of a month. A quick bit of advice here is to not rush through and only reach out to webmasters once – showing the level of work that you put in to Google can be incredibly helpful towards getting your website re-indexed.
3.2 Using Screaming Frog SEO Spider
An awesome tip that I picked up from an article written by Cyrus Shepard was to plug in all of the URLs that linked to the client’s website into Screaming Frog SEO Spider, in order to find any URLs that resulted in a 404. It is often the case with low quality links that their entire site will shut down or disappear. We could then class any of these links as removed.
Once all the results were in, my link analysis team went through and marked each of the links that had been removed as a result of the outreach. This was then added into a Google Docs spreadsheet.
3.3 Educating the Client
Another big part of the project involved me coming in to talk with the client’s internal marketing team. I spent the day personally training the client on SEO and how to abide by Google’s Webmaster Guidelines.
As a result of the session, a document was put together and circulated around the business that briefed everyone involved within the project about link building practices. This ensured that they would be able to avoid any problems like this in the future. I made sure that the circulated document was uploaded as a Google Doc and included within the reconsideration request.
Stage 4: Compiling the Disavow List
Any toxic links that remained pointing to the website after all of the outreach had been done (this was around 2 months after the start of the project) would then need to be disavowed. My advice here is to be very careful when it comes to disavowing links to your website and take a more cautious approach initially.
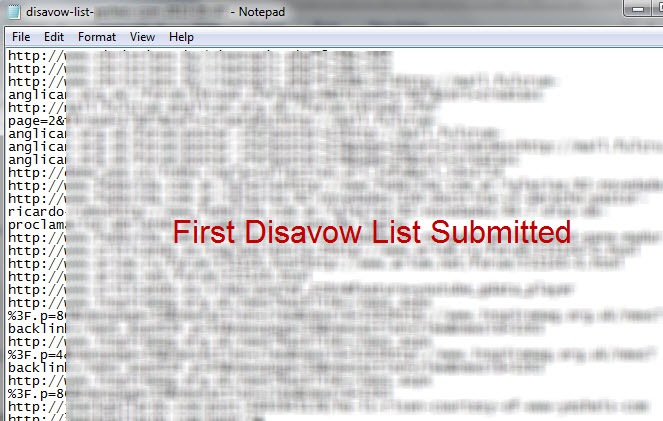
Instead of going with a ‘let’s just disavow everything’ approach, I decided to add each of the toxic links to the disavow list (not the whole domain) – but I meticulously scoured through the links to ensure that none of the good quality links were removed.
Once the disavow list was finalized and doubled checked, I submitted it through Google Webmaster Tools.
Stage 5: The Reconsideration Request
Here’s where we reach the final hurdle. Everything has been done to the best of our abilities, we have gathered all the collateral related to the project and slaved over an extensive reconsideration request. Two weeks later, we received a response…
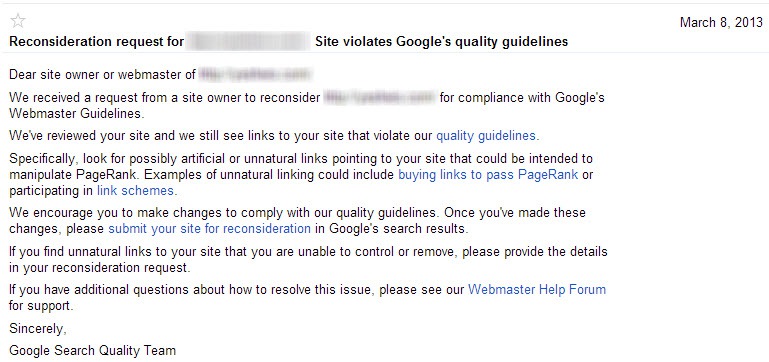
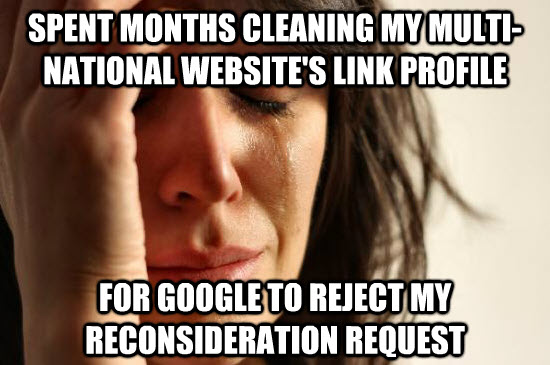
Having the first reconsideration request returned to with a negative response isn’t uncommon. If this has happened to you – don’t panic. Take a deep breath and relax. It’s quite rare that you will be able to find every single bad link on the first attempt because you will always be slightly more cautious on your first attempt – this was definitely the case within our project.
After some deeper analysis, we found the following issues were still not resolved:
- Some of the paid dofollow banners were still live on some of the spammy websites.
- Since the time of our reconsideration request up to the time of our message from Google saying we were still banned, the link analysis tools we used had indexed another 3,000 questionable links.
5.1 Moving on to the Next Request
My advice here is don’t rush into the next reconsideration request. It was clear that the client was keen to get things moving along quickly and wanted to put through another request ASAP – this was where I’ll admit to making an error.
Before we received the response back from the first reconsideration request I had a chat with the client about how confident we felt about getting re-indexed. I was feeling a bit too over-confident and may have shot myself in the foot when giving an ambitious 95% chance of success! Needless to say – I had egg on my face. As a result I really wanted to get a result for the client very quickly and agreed to work double time on the project through the next two weeks and get another reconsideration request out – schoolboy error.
As you can imagine, with added pressure from the client it was easy to miss some of the rising levels of links coming into the website. What we did manage to do was to get rid of all of the spammy banner links, which was a big step. We then updated the disavow list and sent off our second reconsideration request – DENIED.
Stage 6: Getting Re-Indexed
They say third time’s lucky – you certainly need a bit of luck when grovelling at the knees of Google. Luckily for us, we nailed it on the third reconsideration request. After the second rejection from Google we sat down and took a much more prudent approach to the disavow list. This included disavowing all of the toxic links on domain level to ensure that any new links that were getting indexed would still be ignored by Google.
We also spent a huge amount of time going through and re-contacting any of the webmasters that we didn’t get a response from to try and get even more of the links removed. We actually managed to get around 10% of the spammy links manually removed. When you consider that there were thousands of links that were from domains from all over the world, this was a pretty big achievement.
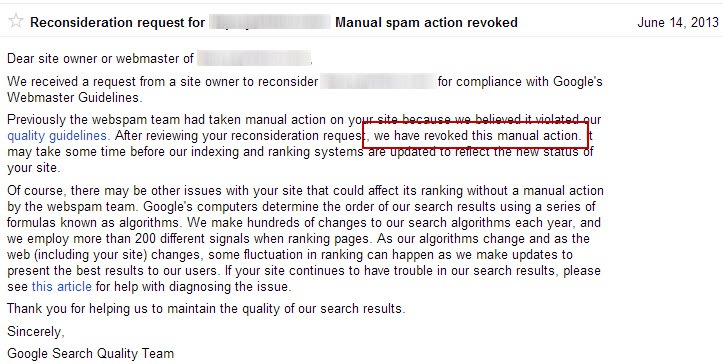
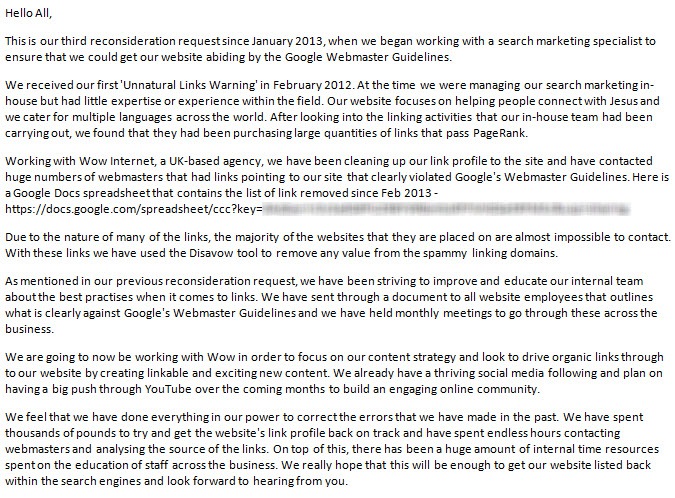
After receiving this message it was a mixture of delight and relief. A lot of hard work went in to the project and I’m currently working on a few more projects as I type. Just for your reference, here is the reconsideration request that I submitted:
Hopefully this project can be a sign of hope to those who have had long-standing manual penalties on their site. The one tip I would give is not to rush anything. Be meticulous and thorough on every process of the project and you will get the best results – rush and you will spend a lot more time in the long-run.


