When Google rolled out penguin there was a tizzy online. Site owners freaked out, SEOs began running tests and searches to figure out what exactly happened. One of the characteristics that seemed to be popping up was over use of exact match anchor text. A few people had even gotten emails asking for the anchor text in their comments to be changed:
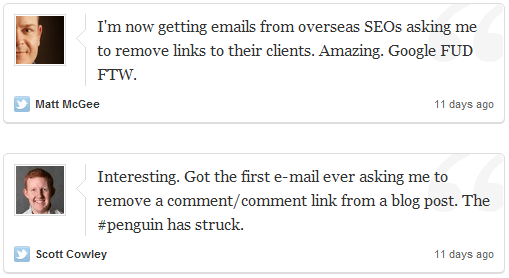 View the story “Please remove my comments” on Storify
Since I don’t practice commenting for links (there is a right and wrong way I just don’t use this method) this wasn’t a big concern for me, and the backlink checks I ran were a relief. Nothing real heavy on any exact match anchors. But then I thought “What about the internal links?” We had been focusing on improving our internal linking on numerous sites the past year, had we gone overboard?
We use a variety of tools to measure backlinks, but the main one we tend to use more often than not is Open Site Explorer (OSE). There is an option in OSE to only check the internal links, but it doesn’t provide all of the information Screaming Frog will on the internal links.
I was beginning to think I would have to just use the data I had until I remembered I had just bought a full license to Screaming Frog. I was able to use the information provided by Screaming Frog to establish what anchors were used, how many times they were used and where they were directed at by also utilizing excel. When I finished this sorting, I then went back and sorted our external links using a similar method using OSE and then compared how we were using our external links against our internal links, I’ll cover that process in part two. Needless to say this provided some great information and insight, not only from a client perspective but from a competitive perspective as well.
But, before we start. What’s Screaming Frog?
What is Screaming Frog?
In a word? Amazing. This desktop application crawls a site from top to bottom (if you’ve purchased a full license otherwise it caps out at 500 URI) and provides just about everything about your site you could imagine to analyze. It’s really easy to get lost when you first fire this up, but let’s stay focused. By the end of this article we’ll have gone through the steps for visualizing the internal and external link data in addition to comparing the two. For now we’re only after the internal linking data.
What you need from Screaming Frog
The internal linking information is located in the “In Link” section located in the lower window:
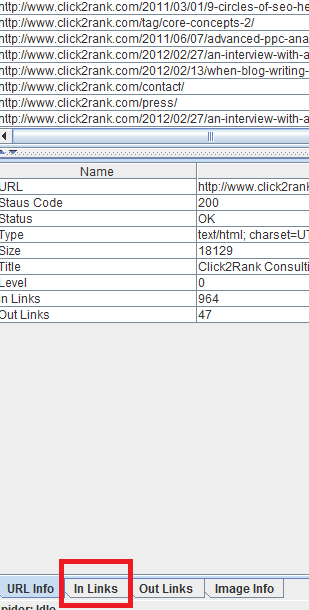
In this tab you’ll see the anchor text, what page the link is coming from, what the alt is (if an image) and if the link is no followed or not. The trouble is, this data is only exportable one page at a time. Meaning, you can’t export an entire site “In Link” data. You have to right click on the page you wish to look at then select export then select “In Link”:
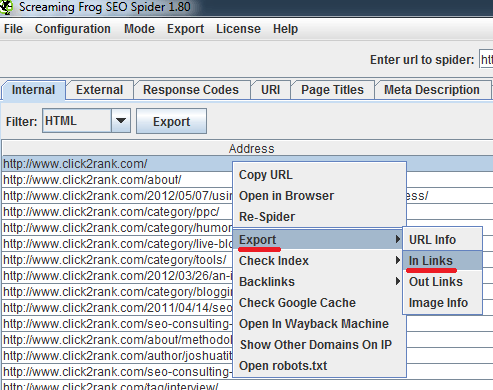
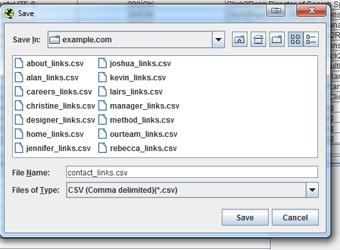
If you want to export only one page and then proceed to the excel portion of this tutorial then go ahead, if you wish to look at multiple pages (or the entire site) you need to create a folder to save all of the CSV files you’ll be exporting the in link files to. Each time you export a file you’ll have to give it a unique name. The default in link file name is “in_links.csv”, and saving one again without changing the file name will just replace the previous one.
This is a tedious process which is why I suggest breaking it down by section. If you just want to check the anchor text of the main navigation, let Screaming Frog run completely then go export only the main navigation sections. If you stop Screaming Frog prematurely it will only show the internal link data from just those pages crawled before it was stopped. Bigger sites will take some time, smaller sites not so much.
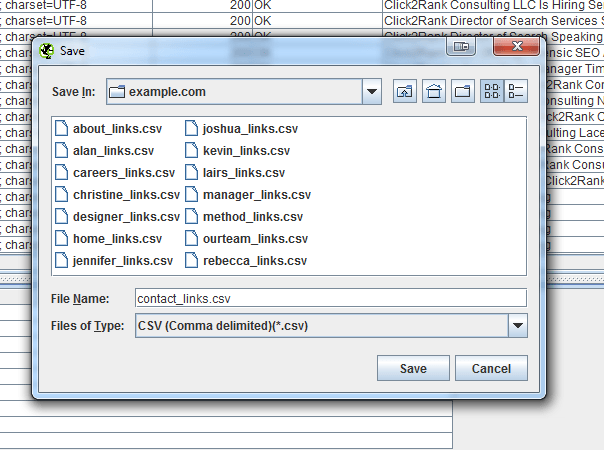
Once you’ve gotten all of the CSV files you need in one folder you’re ready for the next part.
Combining the CSV Files Into One
Open the folder the items are in and click in the address bar to highlight the location of the folder, then copy and paste the highlighted address into notepad.
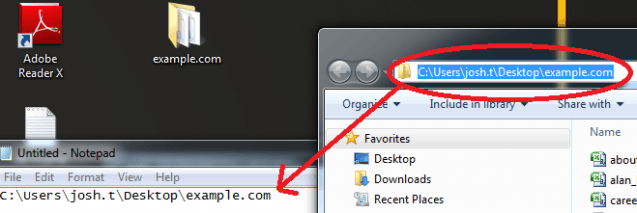
Go to the start menu and search for “cmd” right click on the command prompt to run as administrator. In the command prompt and enter in the address you just pasted into notepad as shown below:
“cd C:\Users\name\file\file\name-of-the-folder-the-csvs-are-in”
(replace the bold with the path you have to the folder containing the .CSVs)

After it shows the next line (the cursor should be beside the folder path now) type in:
copy *.csv allinlinks.csv
(replace the bold with a file name of your choice)
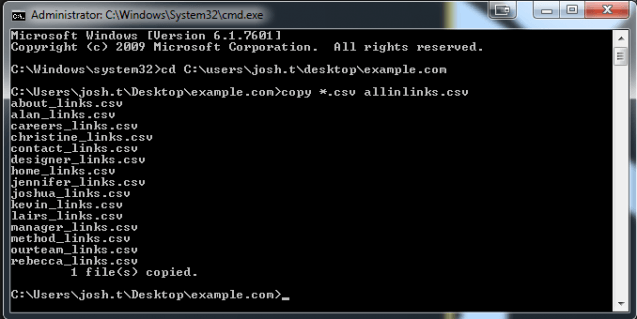
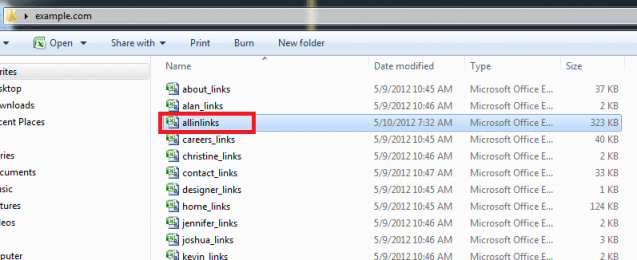
Close out the command prompt and go to the folder you created to find a newly created .CSV file with every other file you exported from Screaming Frog into one.
If you need a better guide on this step of the process check out this guide over at Solve Your Tech.
Sorting the Internal Link Data with Pivot Tables
Open up the new file and sort it by type to find all of the excess sorting information (delete these rows) at the very top and at the very bottom:
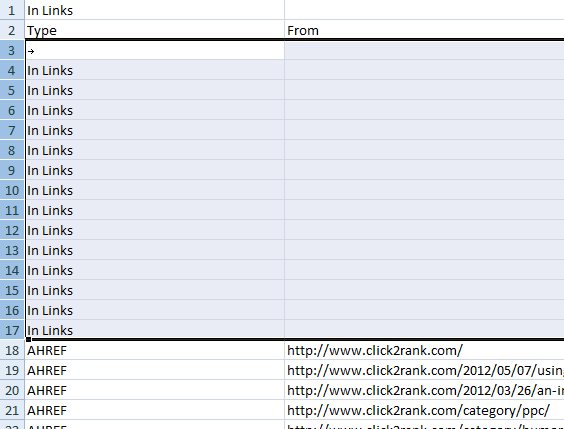
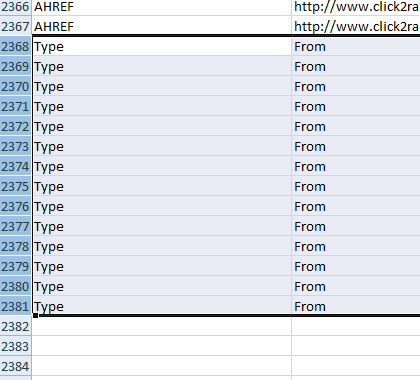
As a personal preference I remove the first column and delete the first row to show only the information I’m interested in. In addition I prefer to switch the names of the tabs and rearrange them:

In my opinion this makes it easier when referencing back to this main sheet when looking at the overall anchor use. But we’ll get to that in a bit.
Next we’re going to create the three new worksheets. First click on insert then click on pivot table (Richard Baxter wrote a great tutorial on pivot tables that’s really helpful). Make sure the setting is set to open in a new worksheet and click okay.
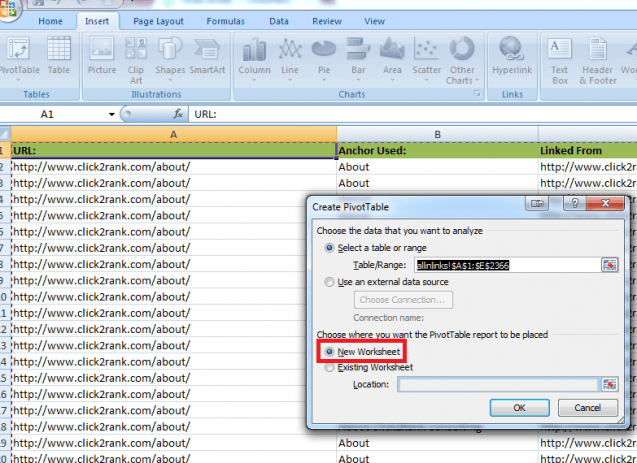
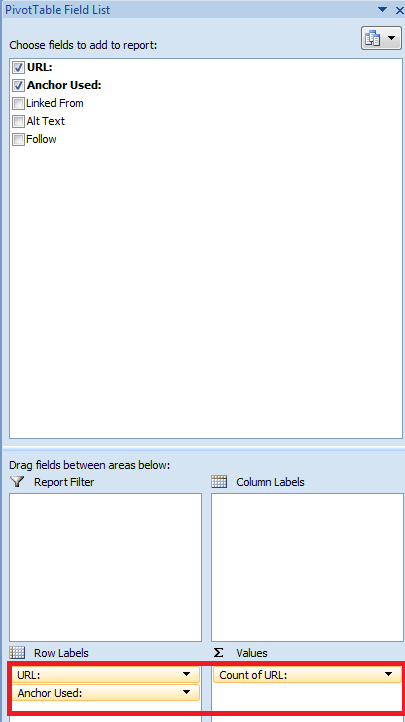
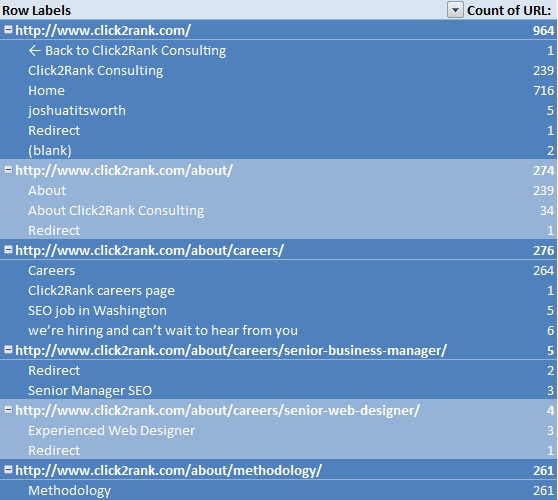
In the new screen select URL and Anchor Used and place them in the “Row Labels” section. Make sure Anchor Used is on the bottom. Next grab URL again and place it in the “Values” section. We’re now able to view how many times each URL was linked to and what anchor text was used and how many times that anchor text was used for that particular URL.
Feel free to resize the columns and color code to fit your liking.
The next tab we’re going to create is one that will give us a visual representation of the URLs linked. So go back to the original tab we sorted and click insert but this time we’re going to click on pivot chart. Again make sure it will open up in a new worksheet and select URL and drag it to the “Row Labels” and “Values” Section. You’ll need to move and resize the chart until you’re able to view it clearly. In this example I’m using a bar chart that is displaying the total number of times these pages were linked to at the end of the bar.
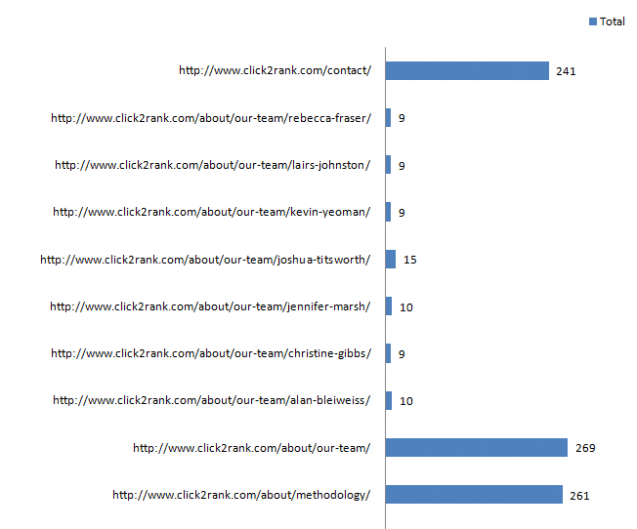
You can also tweak the design settings until you’re at a view that you’re comfortable with.
Return again to the original spreadsheet and perform the same steps you just did to create the bar chart that is displaying the number of times each page was linked to. But when you get to selecting the data to include select the anchor text instead.
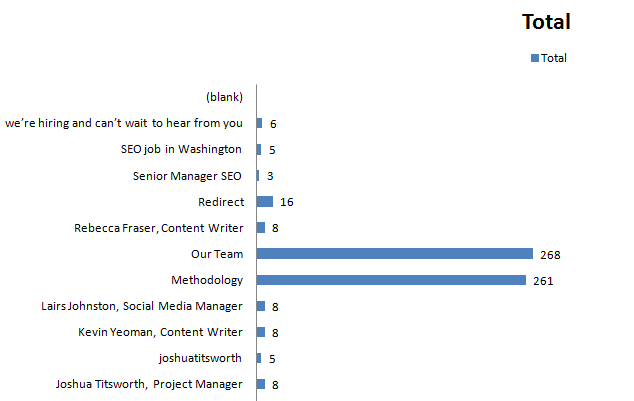
Now you’ll have a visual display of the anchor text used to view.
By the time you’ve done all of this you should have four tabs.
![]() I suggest keeping the original tab to reference back to when viewing the anchor text and an anomaly pops up you’re able to view what page has that has anchor text and where it’s coming from.
I suggest keeping the original tab to reference back to when viewing the anchor text and an anomaly pops up you’re able to view what page has that has anchor text and where it’s coming from.
Okay so, now what?
So you finally got to the end and you’ve got a lot of data to look at. What this information will do is show what you or your clients are focusing your links at internally and with what anchor text. Some questions you should be asking now are:
- Is there enough variety in anchor text?
- Are the pages being targeted with the correct anchor text?
- How does the variety of the internal use of anchor text compare to the external use?
- Are there any pages not being targeted internally that should be?
This is great to use if you’re trying to get an understanding on where previous individuals had been focusing their attention. It’s also perfect if the site is just starting out and you want to keep track of where links are getting directed at. Just re-run the report every few months and keep track of where everything is going and how it’s getting described in the anchor text.
This is also perfect for looking at what the competition is doing internally. If they’re targeting specific pages internally you can also rest assured they’re targeting those same pages in a link building campaign.
Now I realize this will be easier to accomplish for smaller sites than bigger ones. For really big sites I suggest exporting the in link data one section at a time, otherwise you’ll be at your screen all day. Hopefully the folks at Screaming Frog will have a function in their next release that will allow for exporting site wide internal link data. But until that happens, have fun reviewing your internal linking! And stay tuned, part two is not far away.
12/27/12 Update:
First, I want to apologize for those I said I was going to get the second part of this post up. I’ve got no real good excuse other than a mix of life and procrastination got in the way. I really hate writing this but after putting it off and rewriting the follow up post several times I read a few months back a post by Chelsea Blacker of BlueGlass. In the post she detailed perfectly what I was looking to do in the part two of this.
I encourage you to go read the amazing tutorial she put together on comparing your internal and external link spread. It’d detailed, it generates impressive data and more importantly it’s something you can do right now.



![[SEO, PPC & Attribution] Unlocking The Power Of Offline Marketing In A Digital World](https://www.searchenginejournal.com/wp-content/uploads/2025/03/sidebar1x-534.png)