Are you ever looking for ways to complete ongoing PPC tasks quickly, accurately, and without giving up all control?
Me too.
I appreciate all of the automated rules, bidding options, and dynamic ad features that have been created recently but there are often tasks that I don’t want to leave to the automated powers-that-be.
Enter: Excel Macros.
Here are some ways to use this Excel feature that can save you time and help ensure accuracy.
What are Excel Macros?
Excel macros are automated sequences that can be created and personalized to complete a task. Users can record the sequence of keyboard and mouse actions and save it for future use.
Basic Excel Macro 101
Here are the basic things you should know about macros before getting started:
Always save macro workbooks as “Excel Macro-Enabled Workbook (.xlsm)”.
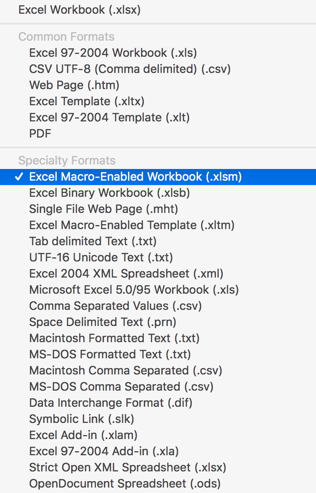
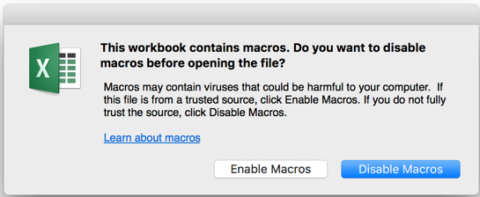
When opening a saved macro file, you will need to make sure to enable macros otherwise your recordings will not work.
If you do not enable here, you will have to reopen the spreadsheet and reenable.
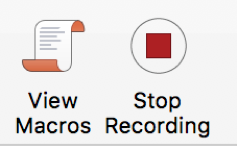
Macros are found on the View tab of Excel (on Macs).
You’ll see two options: View Macros and Record Macros.

To record a macro: Head to the View tab and click Record Macro.
Name the macro so that once it’s completed, where you want to store it and a description if you prefer.
You can also create a shortcut keyboard sequence.

You will need to name each macro to differentiate the function of each. You can also add a description if you need additional differentiating information.
Once you click “OK” to record, at which point all of your actions will be recorded.
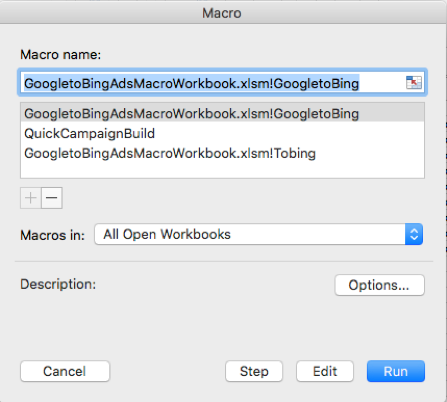
Once you have recorded one or more macros, you’ll be able to go back and view those macros as long as they exist in an open workbook or your current workbook by clicking View Macros.
After you are finished with what you want to record, hit Stop Recording in the View top navigation.
Now that you know the basics on how to get started, how to save your spreadsheets correctly and how to find previously saved macros, let’s hop into four ways to apply macros in your everyday workflow.
1. Search Query Analysis & Negative Identification Filters
Download your search query report with desired metrics and filters applied. Make sure to save your spreadsheet properly before recording.
I prefer to filter for search queries that are not added or excluded when I am running this macro.
Sort your data in Excel by your preferred metric – clicks, cost, conversions, etc.
There are a few different macros you can create for search query mining and negative keyword identification:
High Spend, No Conversions
To identify terms that have spent and not converted that may show low intent: Select the Cost column and apply conditional formatting for your desired cost threshold. In this case, I selected terms that have spent over $12.
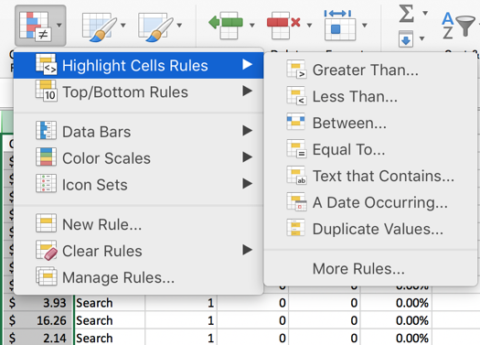
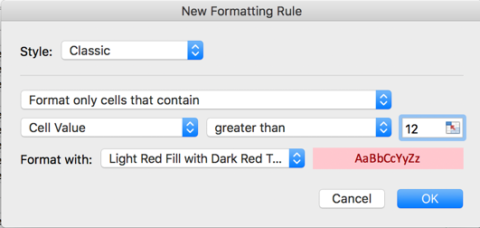
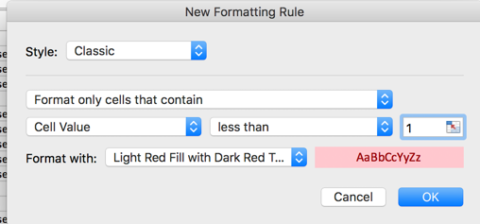
Select the conversions column and apply conditional formatting for less than 1 conversion or Equal to 0 conversions.
Back to Custom Sort, organize your data by cell color starting with the Cost column and followed by the conversion column with your colored cells at the top.
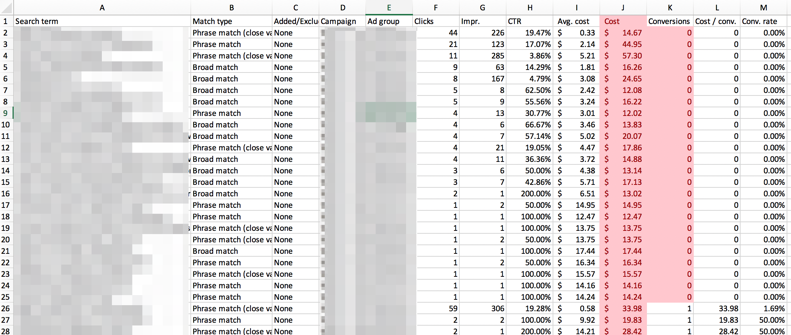
Stop recording. This view will help you identify poor quality terms that likely need to be excluded or may indicate you need a change in keyword strategy.
The next macro may take a little longer and will likely need to be adjusted over time as traffic changes and fluctuates.
Identifying Terms with Desired Negatives
Before beginning, identify a list of words that you would like to exclude from your campaigns.
Remember, this process is much longer during macro setup. A little time now will pay dividends the next time you need to run search query analysis.
Take for example a client whose brand name matches with an unrelated product in India. I would make a list of all the terms that you want to make sure to exclude.
Clear conditional formatting that you previously applied for ease. Name your new macro and begin recording.
Select the Search Term column, begin applying conditional formatting using Highlight Cells > Text that Contains.
Begin entering the terms that you want to exclude so that they’re highlighted. Once you have entered all of the words you want to filter out, sort your data by cell color again.
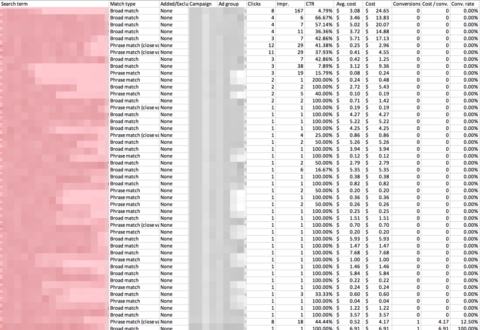
Make sure to save frequently to keep your macro up to date as you’re working through your negative keyword list.
Stop recording. Review the terms and identify which terms should be excluded.
A similar macro could also be created for display placement reports.
You can then proceed with the final part of this macro or stop here since you have identified high spenders and any terms with your desired negatives.
Pro Tip: Pivot Tables
If you’re working with a large account or a large timeframe, it may be worth your while to create a pivot table to better group repeat queries.
Before recording you macro, create a pivot table, then highlight between the headers and total rows and paste into a new sheet so that you’re able to better manipulate the data without the constrains of a pivot table.
Negative Keyword Match Type
To add negative keyword match type, copy and paste your highlighted terms into a new sheet without data.
Create a new macro in a new sheet and start recording. (Since the amount of highlighted terms will vary each time you run the report, you’ll have to do this manually before starting the third macro.)
Duplicate your keywords for as many match types as you will have. Create a new column for match type and drag down to apply phrase/exact/broad.
Stop recording and save your sheet.
Add these negatives to your channels.
2. Campaign Builds for Google Ads Editor
Please note this macro will be easier if you are dividing keywords into their own ad groups while keeping match types together in the same ad group.
Begin this process with a list of desired keywords you are building the campaign for in Column A.
Begin recording the macro.
Duplicate keyword list for as many different match types as you will have and consider adding some additional blanks (for future use) if your list isn’t very long.
Insert row above keywords for data headers. Add columns for Campaign & Ad Group.
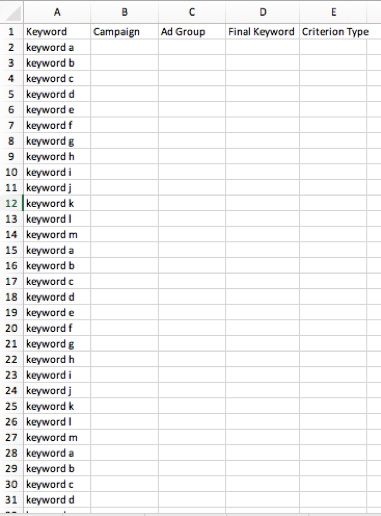
Use the =PROPER function to pull over the keyword into the Ad Group column and name the ad groups. If you don’t care about capitalization, pull over your keyword into the Ad Group column using “=(cell)” which will copy over the text.
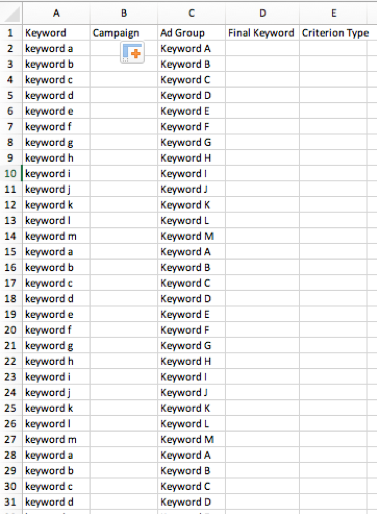
Create a column for Criterion Type and add each of your match types for each list. Drag down to apply and make sure to apply to any empty cells as well.
If you have blank cells, you can add one more step of going to the Data tab in the top navigation, selecting your data and clicking “Remove Duplicates.” End recording.
Name your campaign and drag down to apply to all keywords. Delete any blank rows.
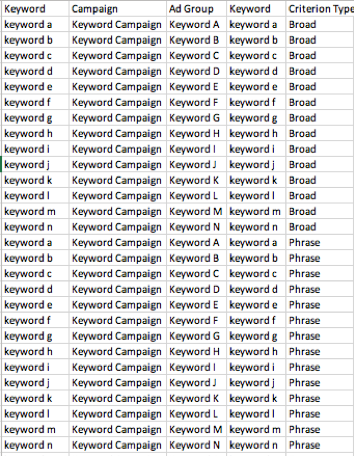
You can now upload this data at the keyword level in Google Ads to create all of the new ad groups, the campaign and the keywords. For broad match modified keywords, I tend to wait to add the plus signs until I am in Editor for ease.
3. Tracking Template Edits
Have you ever had a client completely rework their very intricate tracking? Have a client who is still using manual tagging in 2019?
I’ve been there, too. That’s why I’ve found ways to make quick changes.
Grab a spreadsheet of your tracking templates at whatever level you’re needing – ad, ad group, or campaign.
![]()
Begin recording the macro.
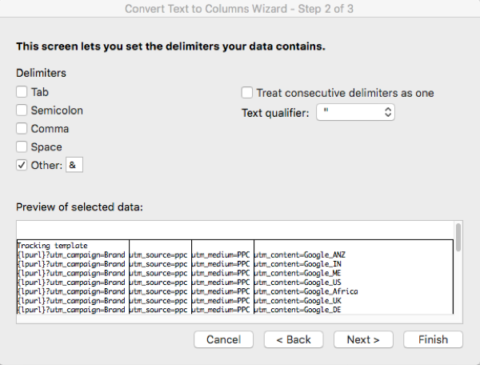
For long or detailed targeting, use the Text to Columns feature, which allows you to break down large strings of text into separate columns.
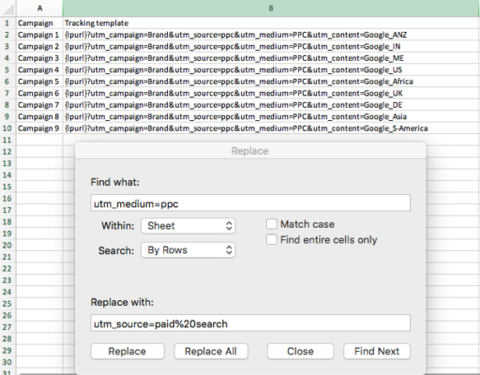
Find and replace any words that you want to change.
Add additional columns for new information and utilize the CONCATENATE function to add the new text.
In the example below I wanted to add a variant number and date to the UTM Content tag so I added two new columns: one for a dash that serves as a divider in the tracking as well as one for the variant/date.![]()
![]()
Once you have replaced and added any desired information, stop recording. You can now upload this data to the channels and you’ll be able to make these same changes later with the click of a mouse.
4. Adjusting Google Ads Data for Upload into Bing Ads Editor
The Bing Ads Editor Google Import tool is very handy. However, over the years, I have found that new ad types don’t always play nice between these two programs.
I often record macros to account for differences in ads.
Pull in a spreadsheet of your ads from Google. Start recording the macro.
Change the Headline titles to Title Part 1 / Title Part 2 / Title Part 3. Change Description Line to Ad Text. Adjust your tracking templates.
For new ad types, I also like to apply conditional formatting to identify differences in character lengths just to be safe.
Stop recording and save.
Get Started with Excel Macros
There are many other ways you can use Excel macros, but this is a good start if you want to save time while staying invested in your accounts.
Invest a little time now to save a lot of time later!
More Resources:
- How to Create a Paid Search Plan That Will Drive Results
- 11 Places You Can Learn Microsoft Excel for Free
- PPC 101: A Complete Guide to Pay-Per-Click Marketing Basics
Image Credits
Screenshots taken by author, January 2019

