If you crank up a ton of blogs per week, you need to be as efficient as possible with your time.
So, let’s say your writers send you a bunch of Word documents with images.
- How do you extract these images and transfer them to your post?
- Do you copy and paste the images from the document? (Time-consuming.)
- Do you require documents to be sent in a .zip file with images? (Confusing, as the images in the .zip will not be in the same order as they are in the document.)
The good news is there are quick and easy hacks for extracting images from any kind of document (Microsoft Word, Google Docs, Google Slides, PDF, and PowerPoint).
Let’s look at them one by one!
The Quick & Easy Way to Extract Images from Documents
There are a ton of benefits to learning how to quickly and easily extract images from documents.
Here are three of them:
- You don’t have to waste time copying and pasting images one by one from a document onto WordPress (or whatever software you’re using).
- You can grab and save photos from ebooks, reports, and presentations you like.
- You save time figuring out which photo is which in a .zip file.
So, are you ready to learn how to do it?
1. How to Extract Images from Microsoft Word
Here’s an example of a Microsoft Word document with an image.

To extract the image (and all images in the document), you first need to save the document as Web Page, Filtered.
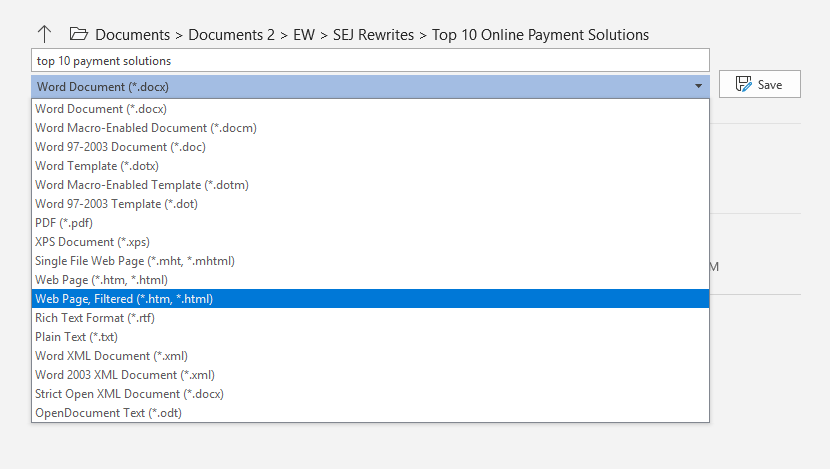
When you do, a new folder will appear in the place you saved the document as a webpage.

Inside this folder, you’ll find all the images from the document.

The beautiful part is all these images will appear in the same order they appear in the Word document.
They’re even numbered!
Remember, the original document won’t be included in the new folder.
Make sure to copy it in if you want to create a new .zip with the extracted images.
2. How to Extract Images from Google Docs
If you’re like most people, you extract images from Google Docs by copying each image onto a different app.
For instance, you paste the images on Photoshop or Paint and save them to your computer.
The problem with this is your photos get resized.
And it’s tedious, time-consuming work when you’ve got a ton of photos to extract.
So, what’s the easy way?
First, open your document on Google Docs. Click File, then Download.
Select Web Page (.html, zipped).
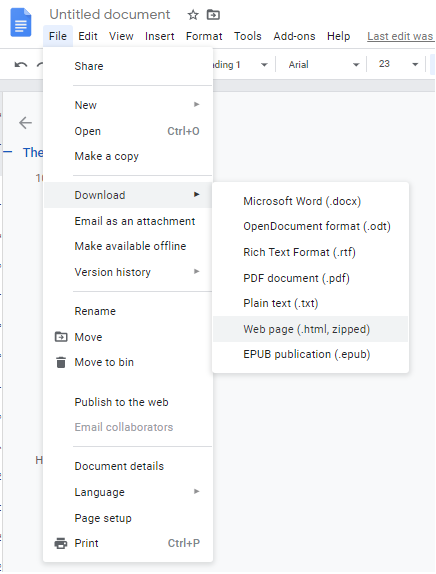
Once you do this, a .zip folder will be downloaded to your computer.
Go to your Downloads folder (or any folder you’ve set for downloads) and look for the .zip.
This is what you’ll get.

All the images in your Google Doc are saved neatly in the folder titled “images.”
3. How to Extract Images from Google Slides
What makes Google Slides difficult is there’s no direct way to save images to your computer.
However, there’s a simple hack to get around this problem.
Here’s how.
Select the image you want to download.
Then, right click and select Copy.
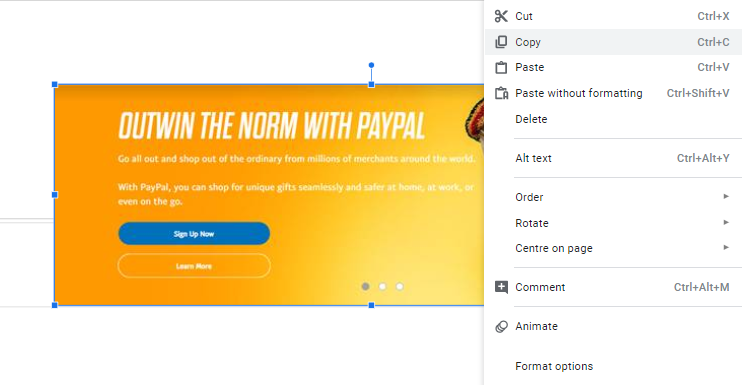
Click File > New > Document.
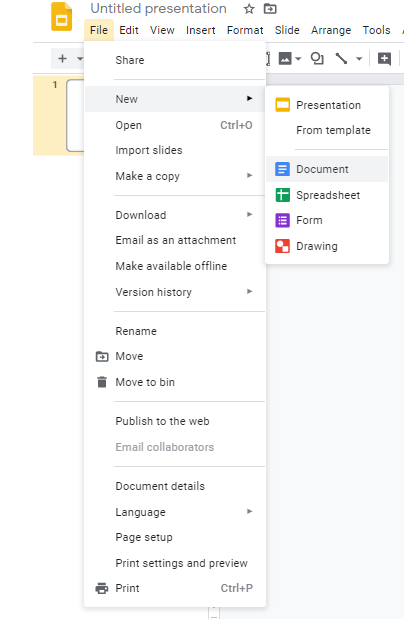
In your new Google Doc, click Edit and Paste.
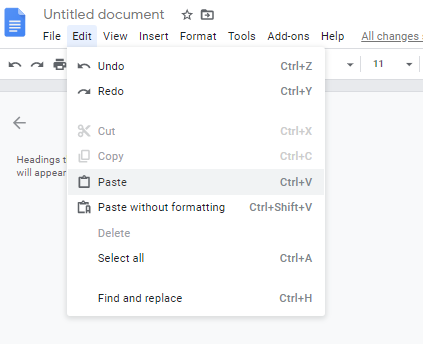
The image will appear in your document.
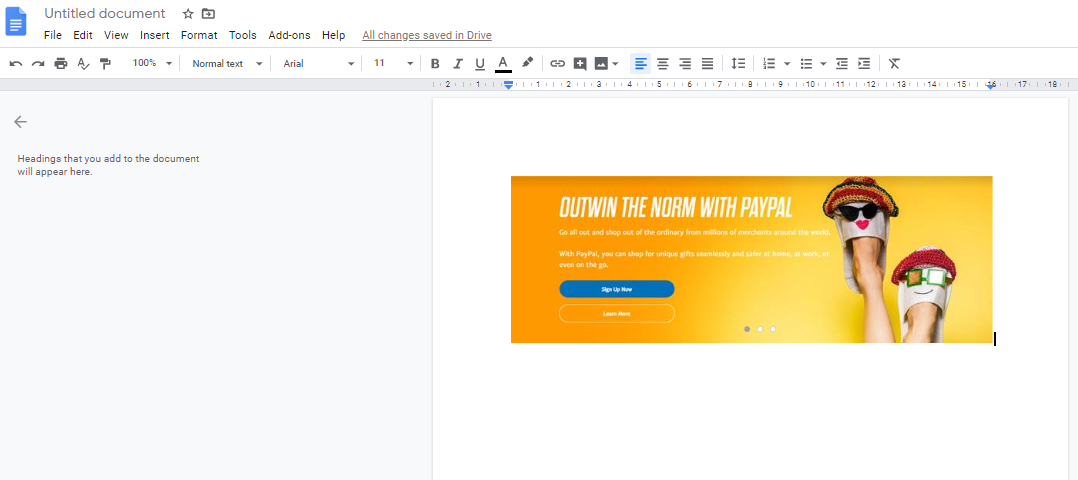
Repeat this with all the images you want to extract from Google Slides.
Once you have all the images in a Google Doc, you can follow the steps for extracting images from Google Docs and saving them to your computer (see #2).
4. How to Extract Images from a PDF Document
Picture this.
You download a beautiful PDF document.
You go through it and see one or two images you’d love to have and use in your own blogs.
But there’s a problem: a PDF document is like laminated plastic.
You can enjoy its content, but it’s for your eyes only.
You can’t edit it, copy it, or extract its images.
Except you can, and it’s super easy if you know the trick.
So, here’s your PDF document and the image you want to extract.

Right click and choose Select Tool.
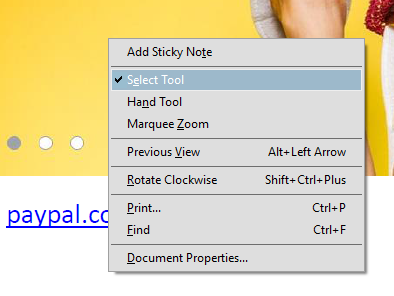
Next, click on the image so it darkens. Like this.

Right click on the image. A copy image tab will appear.

Open an image editing app of your choice.
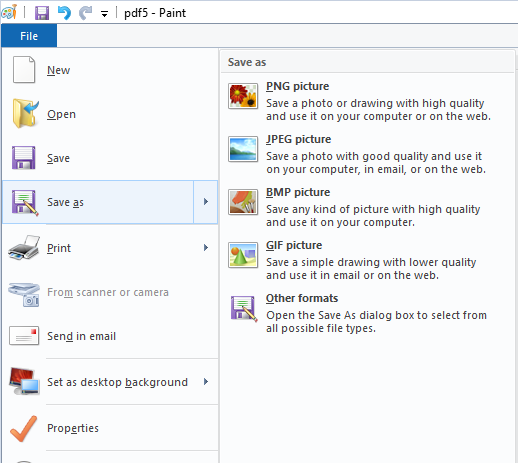
One app that’s effective and simple to use is Microsoft Paint.
Click Paste on the upper left corner of your screen.
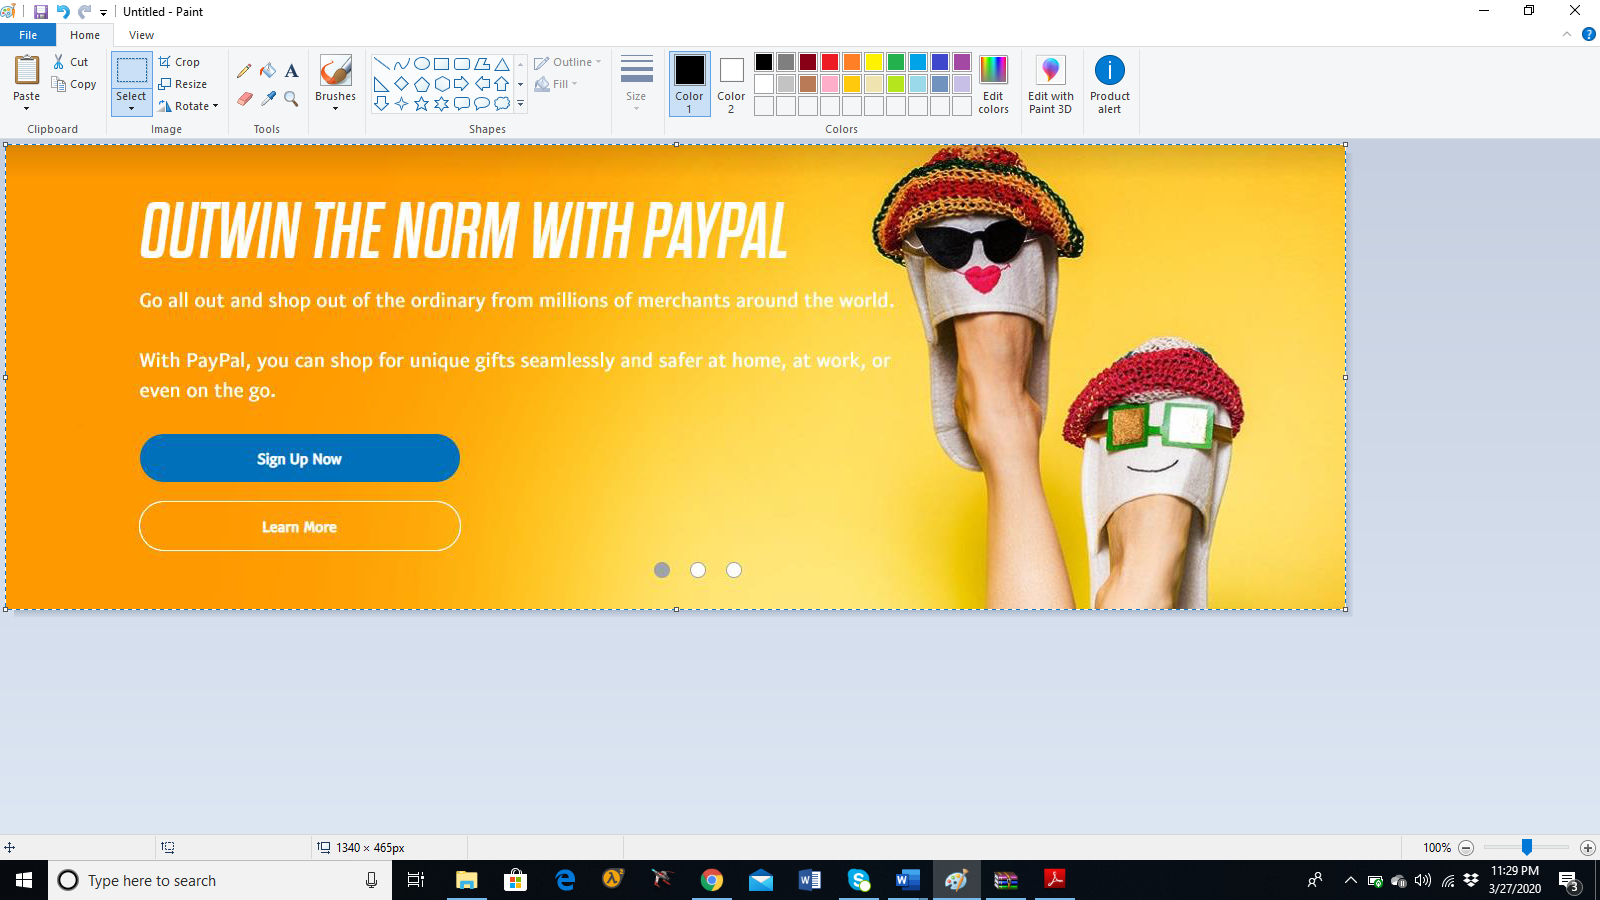
What’s great about using Microsoft Paint is you can save your image as JPG, PNG, BMP, or GIF.
5. How to Extract Images from PowerPoint
There are two important steps to extracting images from PowerPoint.
Set Your File Explorer to Show File Names
To do this, open File Explorer. On the top left of your screen, click View.

Check the box that allows you to see File name extensions.
 Rename Your Presentation
The next step is to change your Powerpoint file from .pptx to .zip.
To do this, right click your file and select Rename.
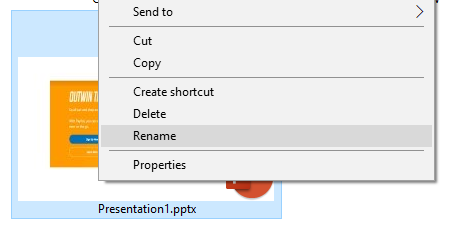
Change the file extension from .pptx to .zip.
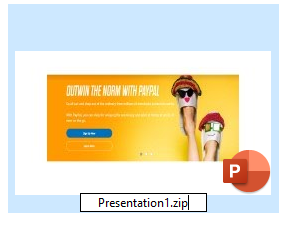
Click Yes when a dialog box appears.
Your new .zip file will contain all the images in your PowerPoint presentation.
Extracting Images the Easy Way
Images are the life of blogs.
In fact, using images in your posts will get you 94% more views.
But it isn’t always easy to find the perfect image.
And even when you do find it, you might not know how to copy and save it to your computer so you can use it later.
The good news is these five simple hacks make extracting images super easy.
They’re all you need to stay prepared for whenever you want to grab that perfect image.
Plus, when your writers send you .zip files, your work is faster and more organized.
More Resources:
- 7 Reasons Why Content Needs Amazing Images, Videos & Visuals
- 41 Places to Find Free Images Online That You Will Actually Want to Use
- The 10 Best Image Search Engines
Image Credits
All screenshots taken by author, March 2020


