On September 6, Google announced the launch of the Data Studio developer program known as Community Connectors, which gives Google Data Studio users of all skill levels the power to incorporate, integrate, and visualize data from any third-party source.
Google is referring to this event as a “developer launch” because, while the system is ready to go at a base level, this period gives developers at large organizations, small businesses, and folks like you and I the power to provide feedback and make recommendations as the service grows.

In addition to this new feature, you now have the ability to embed Data Studio reports onto a webpage via iframe and still retain the same interactivity.
Let’s go into what’s new, what Community Connectors can do for your reporting needs, and dive into an example of building a simple connector and lessons.
What Exactly Are Data Studio Community Connectors?
A Data Studio Community Connector is an Apps Script application that provides Data Studio users the same type of connectivity that pre-built services provide via API querying, except users are no longer restricted to Google-based options for integration choices.
You read that correctly: You no longer need to add an extra step with exporting data to Google Sheets, SQL, or BigQuery. These extra steps can be minimized greatly, especially if you’re a Supermetrics or CallRail user (both are launch partners).
Over time, you can expect to see more options for other SaaS solutions emerge as developers across all industries continue to build scripts for open & vendor-specific data sets.
What Comes with the Community Connectors Developer Launch?
With the developer launch cycle, any Google Data Studio user can take part in its development. Whether you’re a seasoned programmer or merely a copy-paste coder with bigger aspirations, resources are now available for the building of connectors, a gallery where others showcase their creations, and information covering sharing and publishing connectors.
Which Data Sources Are Eligible for Community Connector Services?
In a nutshell, the sky is the limit. Connectors are designed to provide free access to users for data sets across any industry and topic, meaning that if there’s a need and a source, you can build it!
To give you some ideas, here are a list of source types mentioned on the overview section:
Platforms for social media, CRM, search, finance, HR, advertising…Public and other open data sets…Private company data, and any data source or service that can be accessed over the internet using Apps Script.
Personally, I would love to integrate my BrightEdge keyword reporting data alongside location-specific information from Weather Underground for clients that see demand fluctuate based on precipitation. In addition, I could provide a single report for organic and paid search, right alongside social and CallRail data (and the list goes on), making it easier for monthly reporting cycles across teams and even easier for our client contacts to present our summaries to their bosses.
All it takes is effort and some solid testing, and it can be done.
How to Add a Pre-Built Community Connector as a Data Source
Before we go into constructing our own Community Connector, let’s see how easy it is to integrate with pre-built options.

- First, log in to your Google account where your Data Studio dashboard is managed.
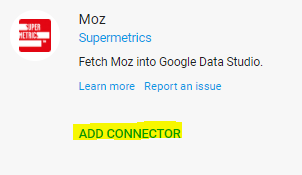
- Next, visit the Data Studio Community Connectors Gallery and see if a service that’s right for you is available. Click Add Connector and you’ll be taken directly to your Data Studio account.
- Once you find the connector you’d like to integrate, you’ll need to authorize. Click Authorize and provide your credentials for the service selected.
- When authorization is complete, you should see “This connector does not require any configuration.” Once you receive this message, click Connect and you’re in!
Note: For many analytics software solutions, such as Supermetrics, required access may come standard with your current service plan. Ensure that your level of service comes with the requisite access level before proceeding.
How to Build a Data Studio Community Connector
If this is your first time building a connector to Data Studio, here are the basic items you’ll need to cover:
Requesting Developer Access
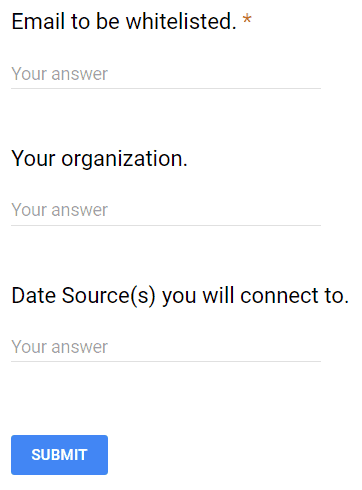
This will provide you with access to features within Apps Script. Simply click the Request box at the top of the Build page and enter your information.

While the form states that turnaround time can take up to four business days, obtaining access can also occur as quick as the same day.
Create a New Project in Apps Script
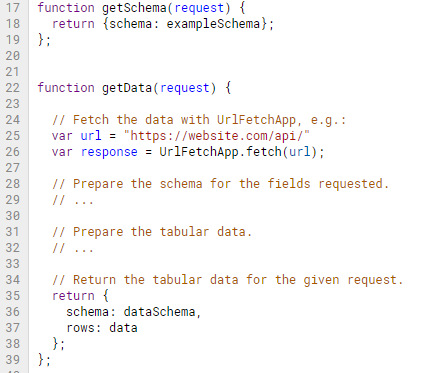
To learn more about Google’s scripting language, visit their Overview section. A basic outline will contain four required functions:
- getConfig(), which contains configuration parameters and options for the connector.
- getSchema(), which provides information about how the connector’s data is structured, including details about data types, identifiers, and name.
- getData(), which fetches the data requested.
- getAuthType(), which returns the authentication method required by the connector for the third-party service.
Develop Your Connector Code
This allows for integration between the service (Moz, Twitter, etc.) and the hosting application (Data Studio). Depending on the service being integrated, this may require time and effort, given that in these early stages, there’s a bit of pioneering taking place.

For some, this may sound scary, but when you’ve tested your connector and it works as it should, you’ll be able to speed up your reporting cycle like never before.
Complete the Project Manifest
This will contain information about your connector required for deployment. Once you’re ready to deploy your connector, follow the connector guide and ensure that you adhere to best practices for version control.
Now that we’ve covered the basics of Google Data Studio’s next leap into their ongoing disruption of the BI status quo with Community Connectors, take the information provided and see how you can dramatically transform your workflow. With a bit of upfront labor and time, reporting as you know it can be less laborious from now on.
Image Credits
Featured Image: Pexels/Pixabay
Screenshots and In-Post Images by Beau Pedraza. Taken September 2017.


![AI Overviews: We Reverse-Engineered Them So You Don't Have To [+ What You Need To Do Next]](https://www.searchenginejournal.com/wp-content/uploads/2025/04/sidebar1x-455.png)