In less than a month, Google Analytics 4 will be a year old. Have you adopted it yet?
At the very least, please tell me you have it running on your site… Please?
Here’s the thing — as we’ve talked about previously, Google Analytics 4 will eventually be our only GA platform option.
This alone isn’t a big deal. However, given that GA4 does not populate data from Universal Analytics, you need to get to tracking!
Alright, I’m off the high horse. Let’s talk about how to properly set up GA4 so you can get going.
Google Analytics 4 Properties
Perhaps one of the biggest fundamental changes in Google Analytics 4 is the way “properties” are handled.
Universal Analytics forces you to create a separate property for each of your online entities.
If you have an iOs app – property. Android app – property. Website – property.
In GA4, properties are created using data streams. A data stream is used to pull data from an online entity and push it into your property.
Each property can have up to 50 data streams.
That means all of your data lives in one place! You see it all together in order to get a better picture of your users’ journeys.
Setting Up Your Data Streams
Correctly setting up your data streams is necessary for getting the most out of GA4.
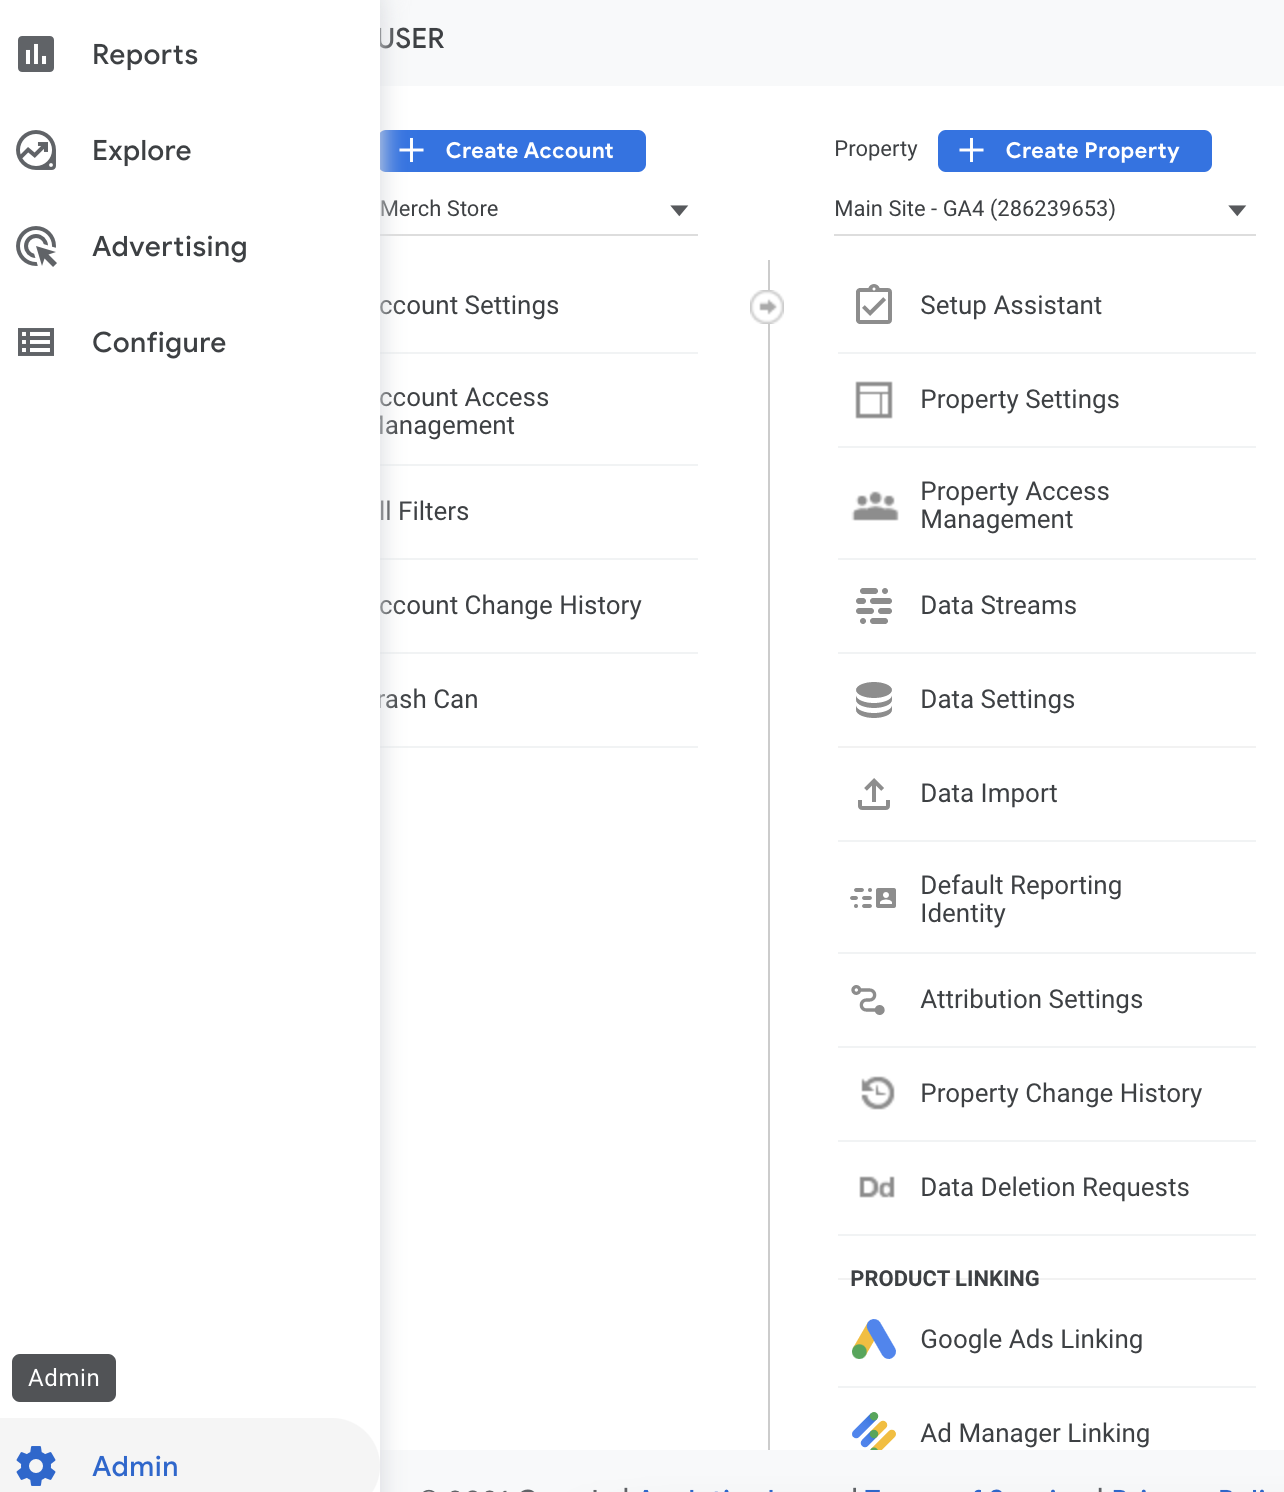
To create a data stream in GA4, go to the settings of your account and under Property select Data Streams.
 Screenshot from Google Analytics 4, September 2021
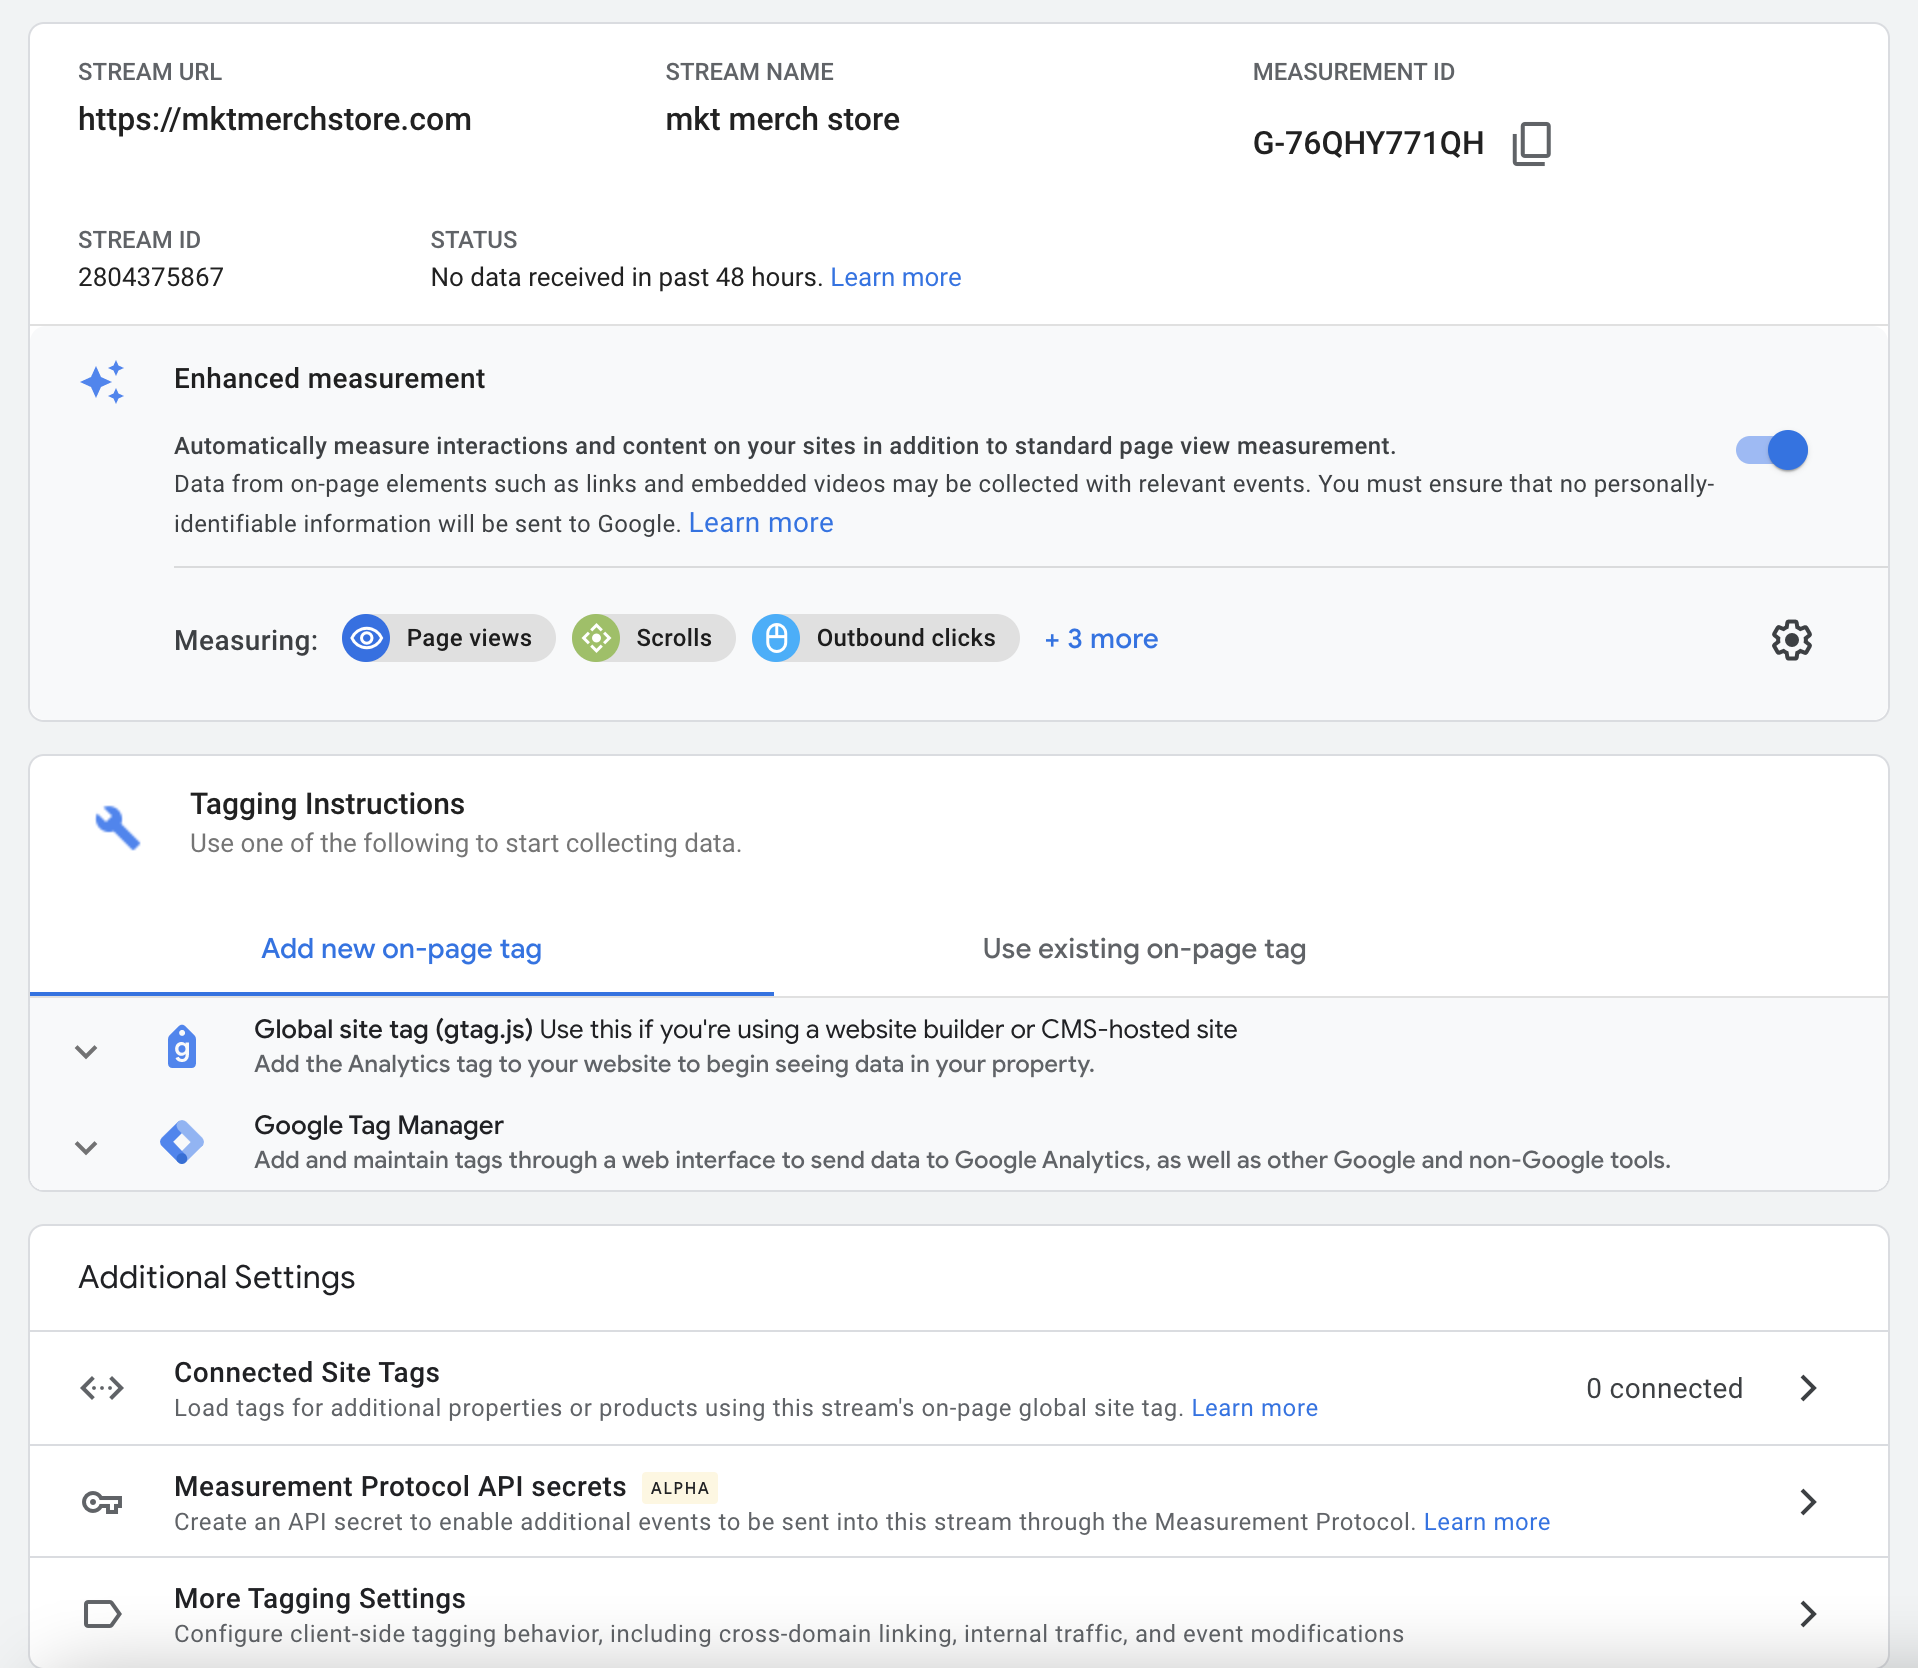
 From here, you can create your data stream by selecting Add stream, then choosing what type of entity you would like to pull data from (iOs app, Android app, or web).
It’s really easy to speed through this setup process, but make sure you slow down! You may want to blow by this screen, but super important things go down here.
PS. If your streams are already set up, no worries. You get the same options when you go to Admin > Data Streams and click into your data streams.
Cross-Domain Tracking
One of the most overlooked configurations of Universal Analytics is cross-domain traffic. What’s frustrating about this is the fact that so many people have multiple domains!
However, it’s not the most straightforward process in UA.
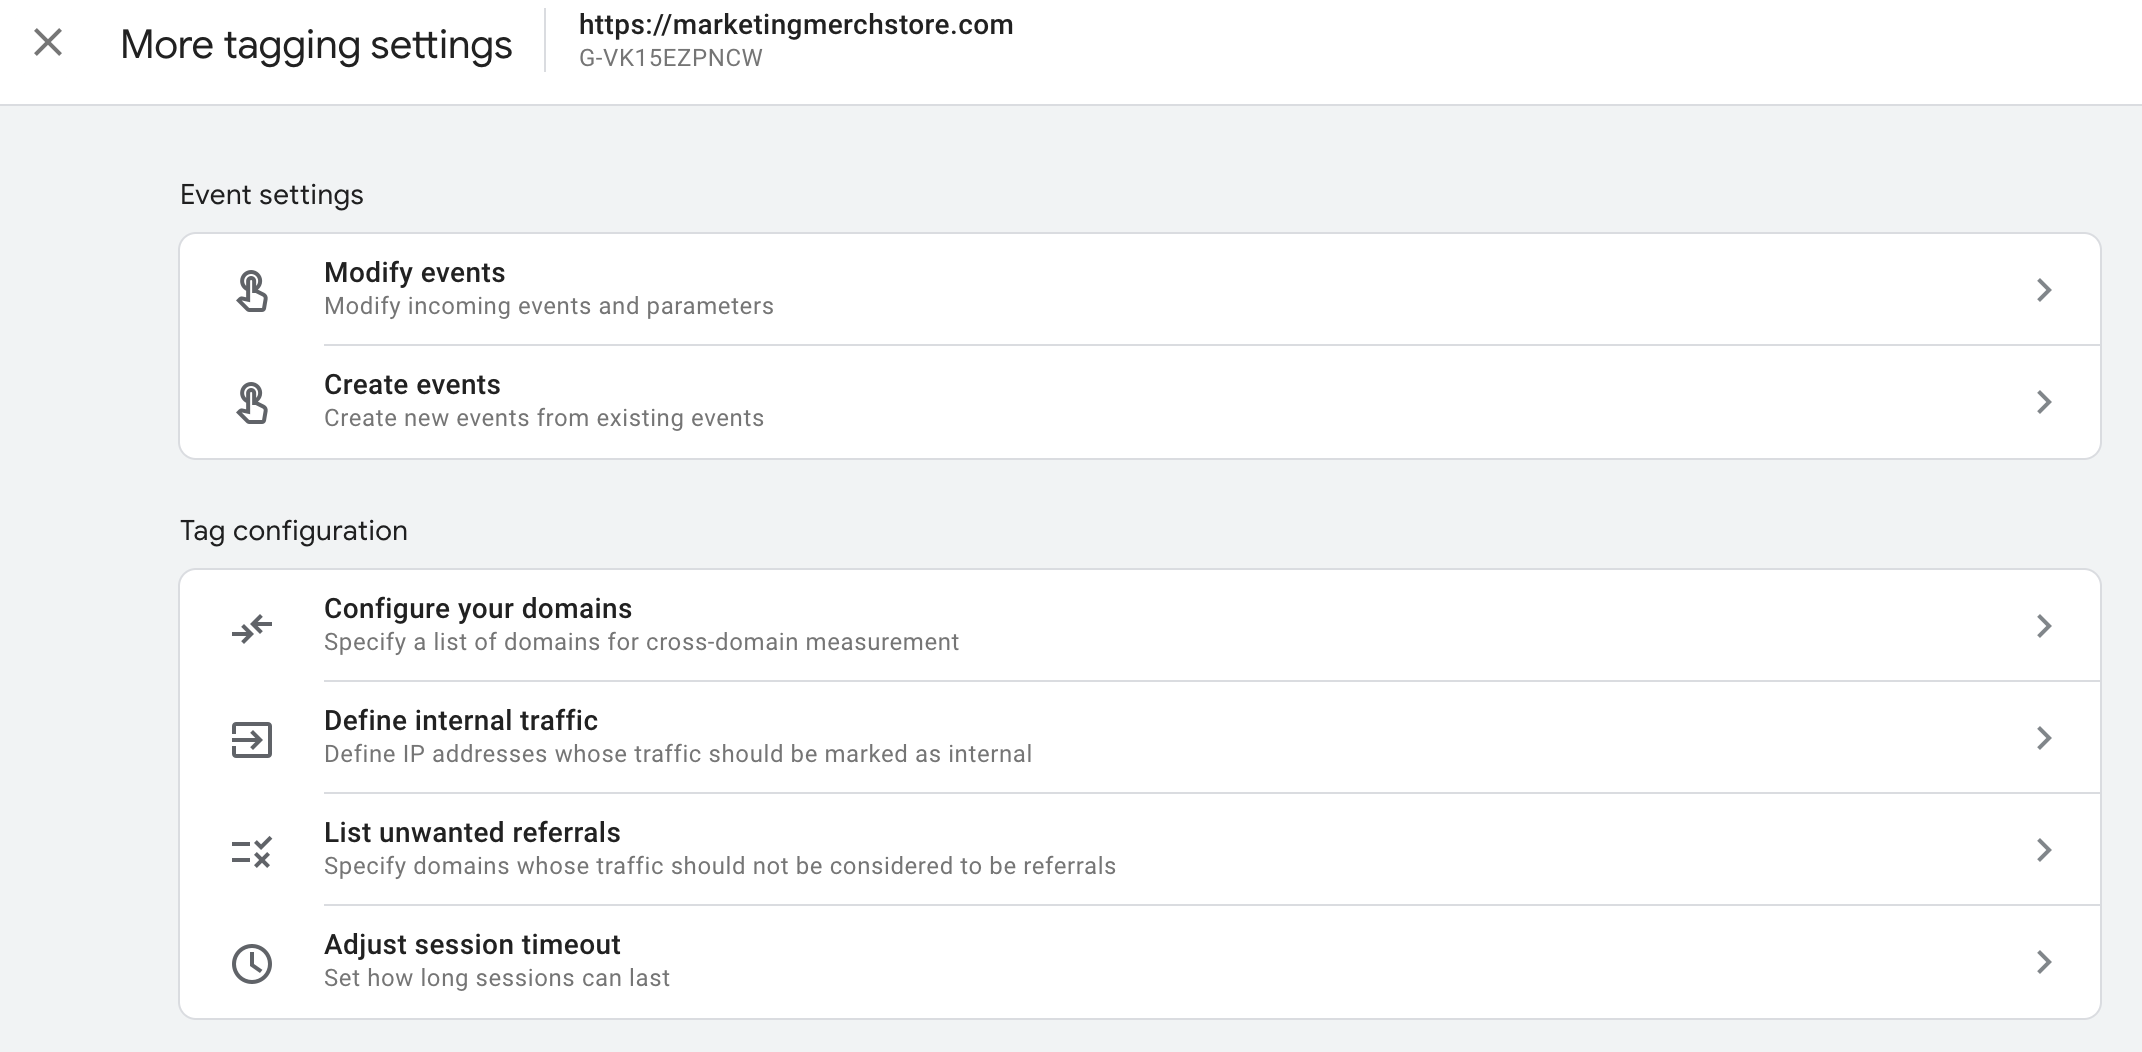
When you set up your data stream in GA4, cross-domain tracking is handled under More Tagging Settings.
 Screenshot from Google Analytics 4, September 2021
 To set up cross-domain tracking using GA4, simply go to Admin > Data Stream > More Tagging Settings > Configure Your Domains.
From here, you just define the domain parameters and place the tag on those sites, and Bam!
You’ve got cross-domain tracking.
IP Filters
A lot goes on in this view of More Tagging Settings. On this screen, you are able to define IP traffic you would like to filter out.
 Screenshot from Google Analytics 4, September 2021
 To do define internal (or other IP specific) traffic in GA4, you go to Admin > Data Stream > More Tagging Settings > Define Internal Traffic.
On this screen, you are able to define the IP addresses you don’t want to track traffic from.
Domain Referral Filters
Right under Define Internal Traffic you see the option to List Unwanted Referrals. This is a really beneficial filter for those who use a third-party payment processor, a landing page platform, a blog platform, etc.
To define the referrers you want GA4 to ignore, you are able to choose from the following match types:
- Referral domain contains
- Referral domain begins with
- Referral domain ends with
- Referral domain exactly matches
- Referral domain matches RegEx
Match types can be stacked with and/or conditions.
Adjust Session Timeout
The last option on the More Tagging Settings screen is Adjust Session Timeout. Obviously, this is where you can adjust the session timeout settings. You may not think this is important, however, the default session timeout is 30 minutes.
Not sure about you, but I think 29 minutes is a long time to just sit idle before taking your next scroll.
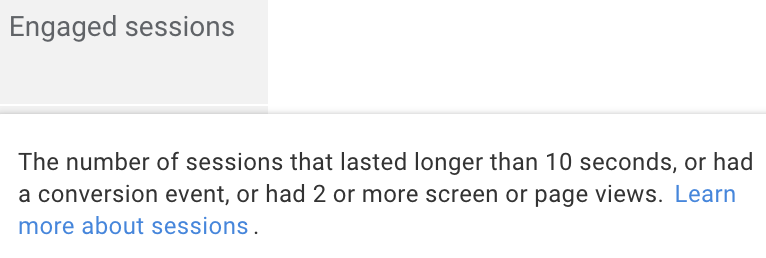
You’ll notice that this screen also allows you to Adjust the Timer for Engaged Sessions. By default, the timer is set at 10 seconds.
Now, you may feel like adjusting this, but it’s important to note that in GA4 Google refers to engaged sessions as 10 seconds or longer.
 Screenshot from Google Analytics 4, September 2021
 It may not seem like a big deal, but engagement metrics are all based on engaged sessions and engagement metrics have replaced behavior metrics (like bounce rate).
So adjust that timer cautiously.
Connect to Google Ads
After setting up your data streams, the next thing to consider is the Google product linking. Now, GA4 isn’t near as robust as UA; however, there is still an option to link to Google Ads.
If you are running Google Ads, you want to connect Google Ads to GA4.
Without getting too far into it, GA4 offers predictive audiences. Those predictive audiences can be marketed to using Google Ads.
Connect to Big Query
For all of the data nerds out there, this is likely the best news of the post. You can now connect to Big Query without having Google Analytics 360.
To connect your GA4 account to BigQuery:
- Go to the admin screen and under the property column and select BigQuery linking.
- Select Link in the top left corner.
- Select Choose a BigQuery Project.
- A list of the BigQuery projects you have at least “read” permission to will appear, choose the project you want to link to.
- Choose the location for the data.
- Specify which data streams you want to export.
- Choose how often you want to export the data.
- Review & submit changes.
And just like that, you have a GA4 connection to BigQuery.
The Fundamentals are Fundamental
You may not love GA4 yet, but in order to give it the best shot, it’s imperative that you set it up correctly. And as you can see, it’s not terribly hard!
As you go through the process, you’ll see that there are indeed a few signs that show Google *may* have been listening to marketers’ needs and that they really tried to make it as easy as possible.
More Resources:
- Google Analytics Gets 4 Powerful New Features
- Google Announces New Reporting Features in GA4
- How to Do an SEO Audit: The Ultimate Checklist
Featured image: Sammby/Shutterstock


![AI Overviews: We Reverse-Engineered Them So You Don't Have To [+ What You Need To Do Next]](https://www.searchenginejournal.com/wp-content/uploads/2025/04/sidebar1x-455.png)